Sales Playbook Templates
Customize this sales playbook template to give your sales team the help they need when and where sales plays happen.
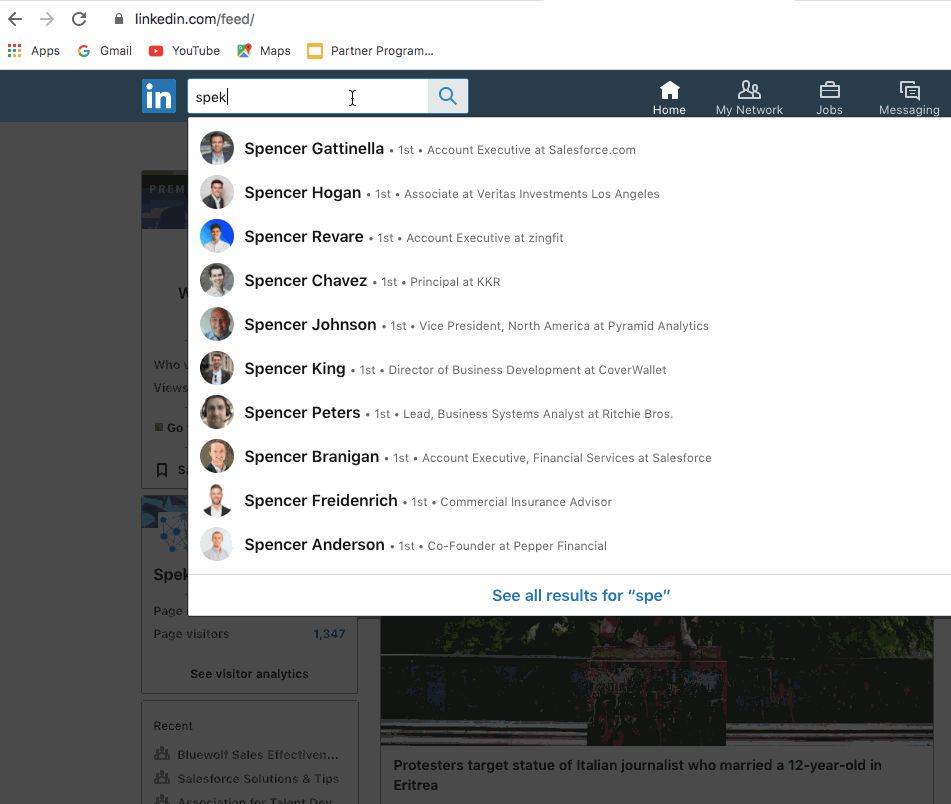
1. How to research companies on LinkedIn
When it comes to personalization, the most important thing to ensure the prospect takes away is why them, why now.
Search for the company name in the LinkedIn Search Bar and go to the company page:
Now, start doing your research:
ABOUT US - Get a high-level understanding of the business. Specifically, look for:
- Brief description of Products/Services/Industry company (so you can use their terminology in outreach)
- How long has the company been around (Is this an established company with existing systems in place?)
- Number of offices/locations (this gives you an idea of whether "dispersed employees" is relevant.
Next, go to INSIGHTS to get an idea of the total employees, employee growth, and any relevant top hires.
- High growth = lots of hiring/onboarding needs
- Spike in growth = could indicate an acquisition, verify by looking at the news
- Top New Hires: any senior management that was recently brought in
Next go to the JOBS section - this is where you'll get an understanding of any key roles they're hiring in the department you sell to:
Finally, look at HOME tab for any recent posts announcing:
- Market/Office Expansions
- Partnerships
- New products they’ve launched
- Acquisitions (lots of employee training needed there)
2. How to search for prospects in LinkedIn Sales Navigator
How to search for Leads and Accounts
1. From the Home Page of Sales Navigator, click "All filters" next to the search bar
2. Select "Lead filters" or "Account filters" from the dropdown.* We'll use Lead filters as an example, but these tools can be applied to both.

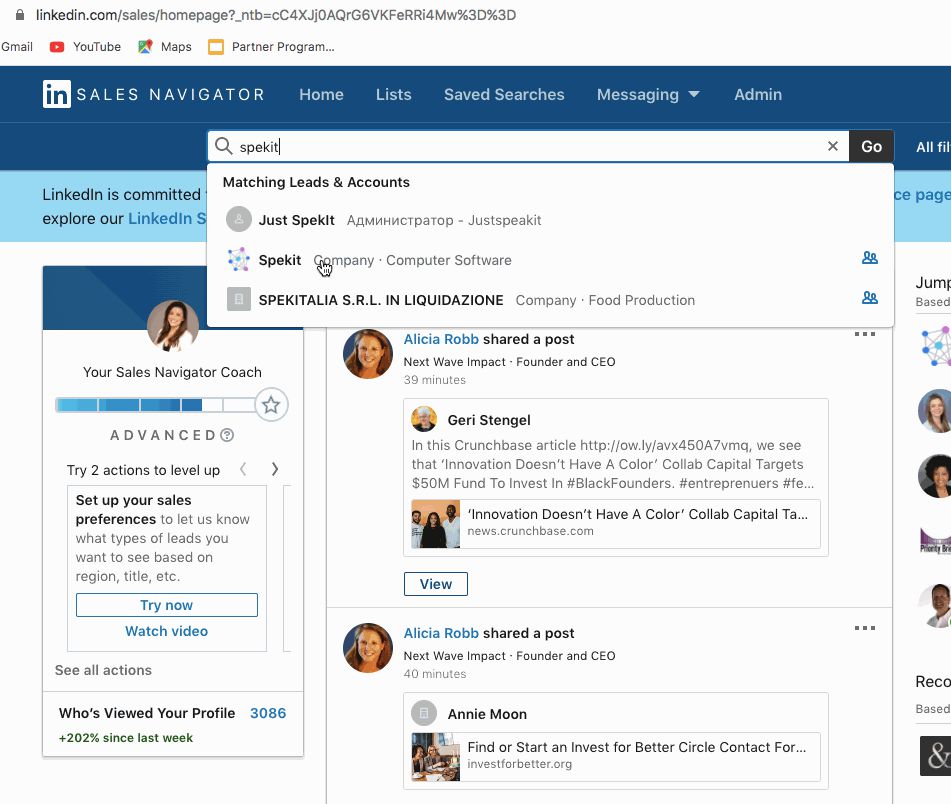
You can also start this search instead by searching for a specific account in the search bar, and then clicking into their employees:
3. Apply your filters. Filters are a great way to narrow down your results to find specific accounts & contacts. Boolean Search phrases can be applied within each of these filters. Here are all the top Boolean searches for our roles.
Some of the common filters you will use include:
- Title
- Industry
- Custom Lists *
- Company Size (# of employees)
- Company Growth Rate
- Keywords
- Annual Revenue
Custom Lists are an extremely powerful way to filter your Lead search down based on a specific set of accounts. View the tutorial Spek here to learn more.
4. Leverage Linkedin's "Recommended Filters" - these are not officially labeled by Linkedin, but can help you narrow lead results down in some really useful ways to find:
- Leads that follow your company's Linkedin page
- Leads who have posted on Linkedin in the past 30 days
- Leads who changed jobs in the past 90 days
- Leads mentioned in the news in past 30 days
- Leads who share experience (Past Companies) with you
Happy Hunting!
3. How to create a Lead (Salesforce Lightning)
Click here to launch the interactive step-by-step flow
Start in Salesforce on the Lead Object. Leads are people and companies that you’ve identified as potential customers.
Business Process
Follow these steps to create a Lead:
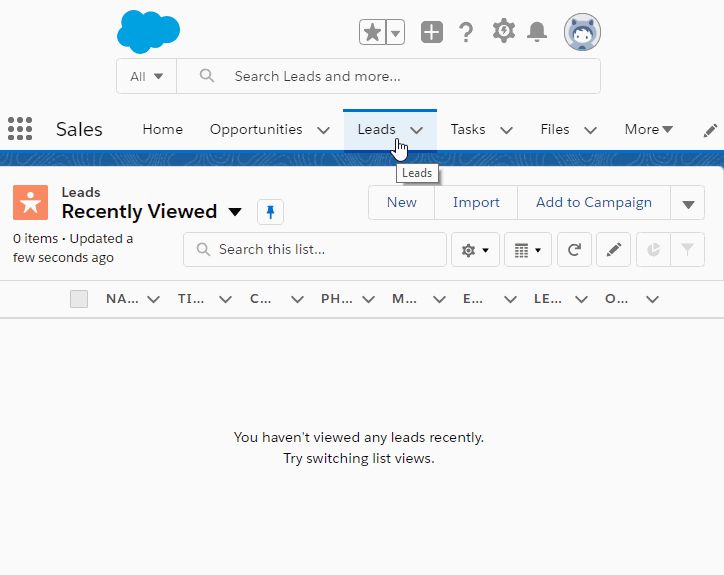
1. Click on the Leads tab at the top of your Salesforce page.

2. Click on New.

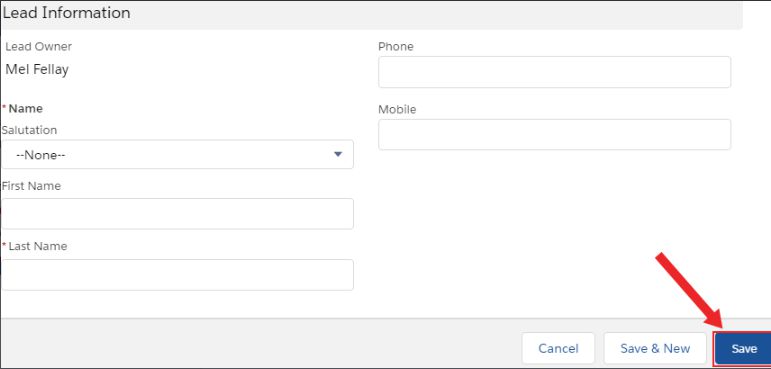
3. Fill in the required information and click Save.
4. How to add a Prospect to an Outreach Sequence from Salesforce
You can add either a single prospect or multiple prospects from a Salesforce list view to an Outreach Sequence.
Business Process
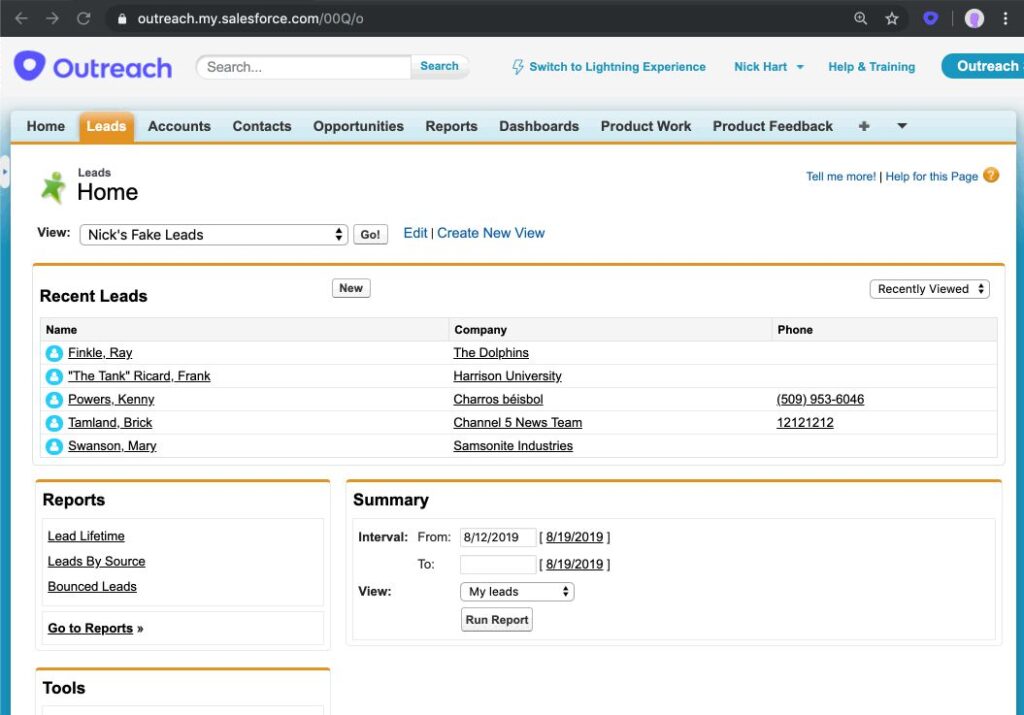
Sequence a Single Prospect from the Salesforce List View
- Create a Salesforce list view of the prospects you're interested in sequencing.
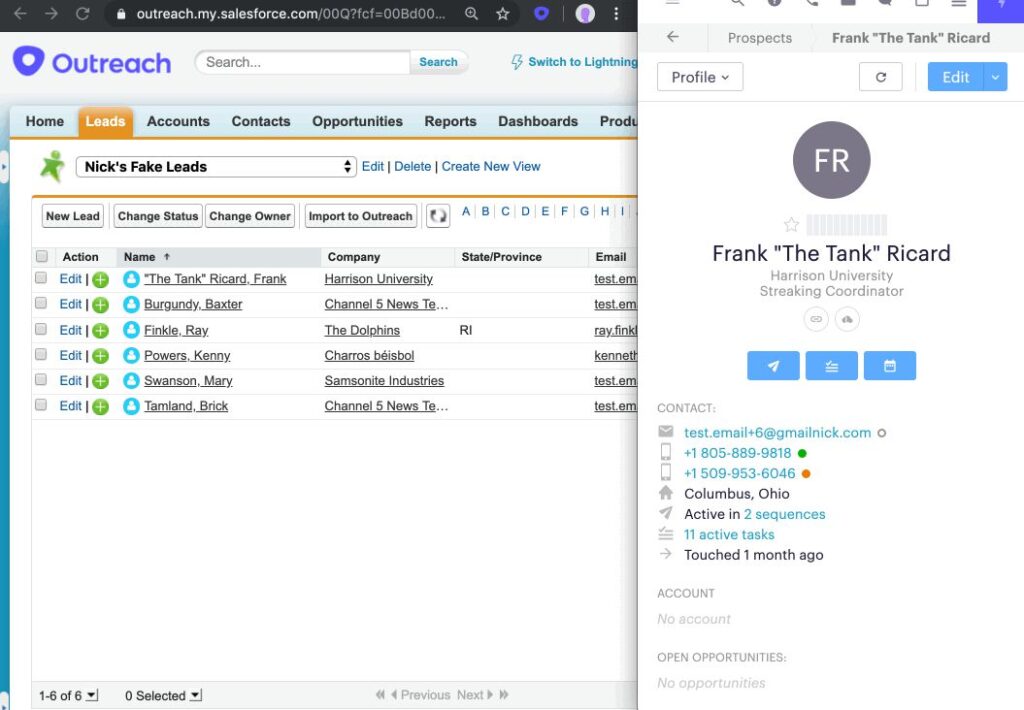
- To sequence a single prospect, click on the Outreach icon next to the prospect's name. The Outreach Everywhere extension will open.
Note: If the prospect does not yet exist in Outreach, you will be presented with an option to import this prospect. Once you proceed, the prospect will be created and the information that your admin has mapped from Salesforce to Outreach will automatically be added to the prospect profile in Outreach.
3. Under the prospect name, click on the button with the paper airplane.
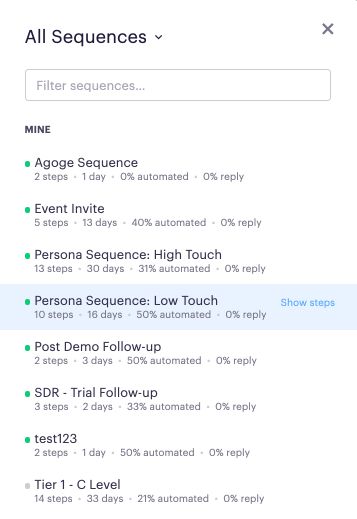
- Select the sequence you'd like to use by filtering by Collection, using the search, or scrolling through the list of available sequences. You can select "Show steps" if you want to preview the steps in the sequence.
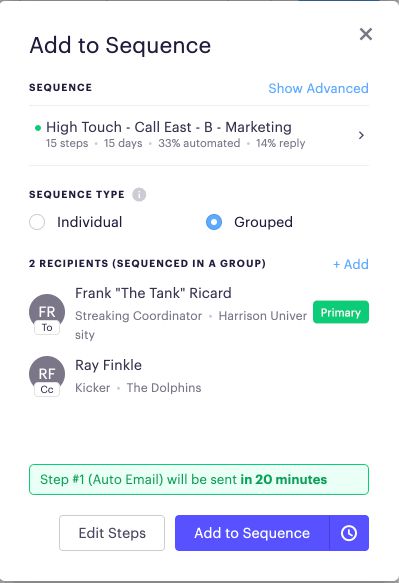
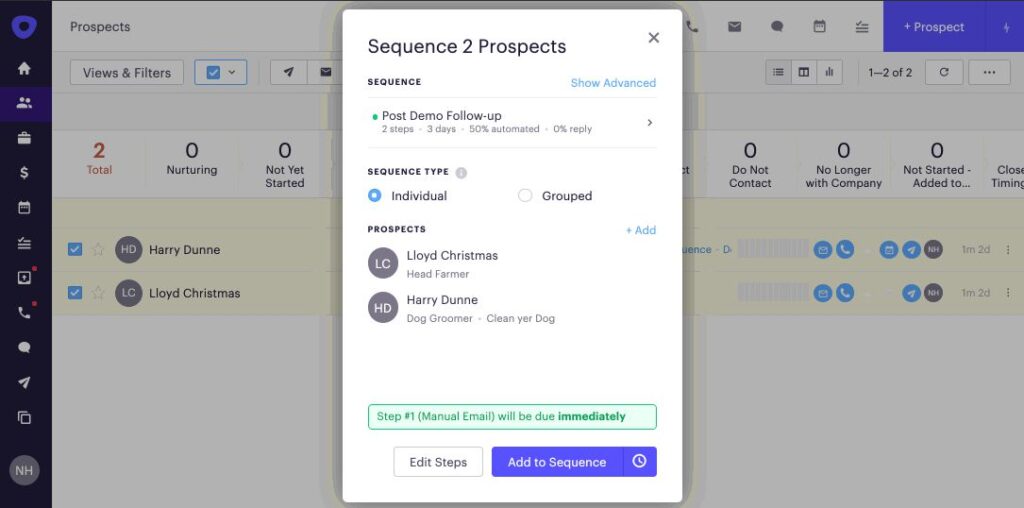
- Next, you can decide if you want this prospect sequenced independently (this is the default) or if you'd like to add a recipient, for example, another prospect or one of your colleagues. If you'd like to add an additional recipient select "+ Add". This will group the prospects on the Sequence. Grouped means that all of the prospects will be included on the same email thread (on To or Cc). The prospect marked as the primary will be added to the "To" field. All other prospects will be added to the "CC" field.
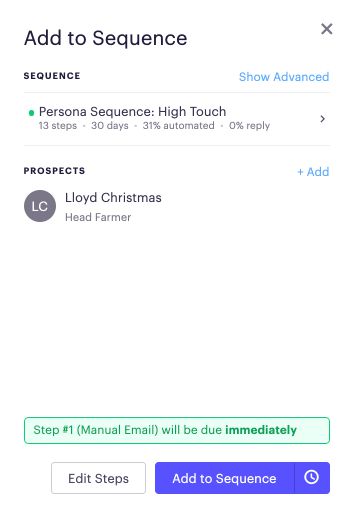
- If you'd like to modify any of the email steps within the sequence right now, you can do so by selecting "Edit Steps". This allows you to customize both Auto Email and Manual Email steps at once. For Manual Email steps you will still receive a task once that step becomes due, at which point you can include additional customization. If you do not see the Edit Steps option you may have this permission turned off. Check with one of your admins to enable this option. Once you are satisfied with your edits, hit "Done".
7. Click "Add to Sequence".
Modifying Sequence Start
From here you can modify how your sequence will begin for the prospects that you selected.
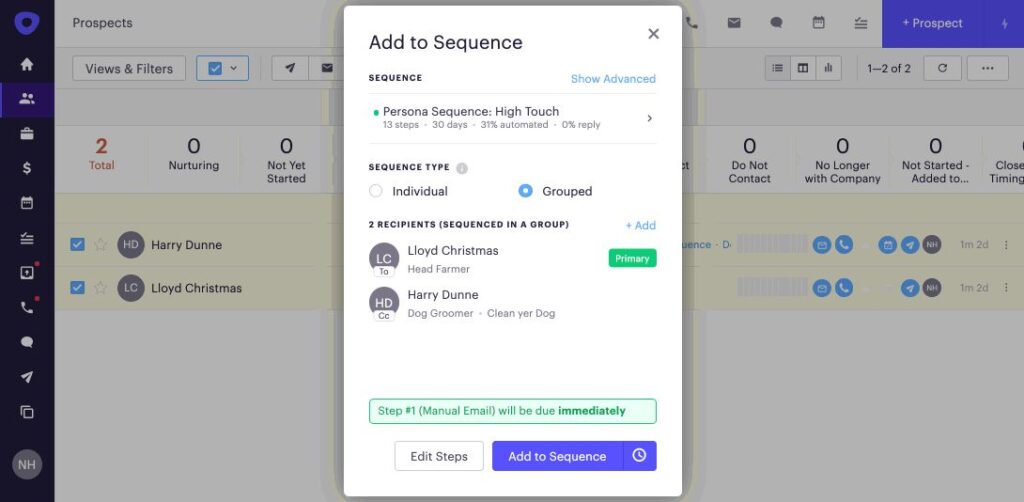
- You can decide if you want all of the prospects sequenced independently (this is the default) or grouped. Grouped means that all of the prospects would be included on the same email thread (on To or Cc). The primary prospect will be in the "To" field. Additional prospects will be added to the "CC" field.
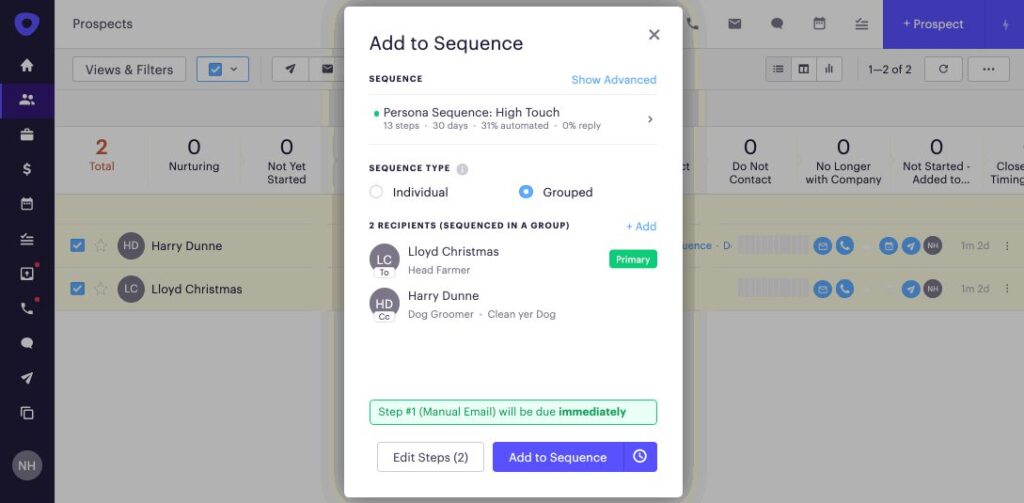
- If you'd like to modify any of the email steps within the sequence right now, you can do so by selecting "Edit Steps". This allows you to customize both Auto Email and Manual Email steps at once. For Manual Email steps you will still receive a task once that step becomes due, at which point you can include additional customization. If you do not see the "Edit Steps" option you may have this permission turned off.
3. If you would like to specify when the first step of the Sequence starts, click on the clock icon and choose the date and time you'd like the sequence to begin.
4. Once you have made all of your modifications click "Add to Sequence". From here, you will get a confirmation to let you know that everything is set. If not, you will receive an error message and the option to make adjustments.

5. Booking a Meeting and Converting a Lead
I just booked a meeting. What do I do? After a prospect agrees to meet with us, follow these steps:
1. Create Google Calendar event including your AE and any prospects who agreed to the meeting.
- Zoom links for individual AE's can be found in the AE Meeting URLs Spek.
- Title the meeting: "Company Name | Spekit Discussion" OR "Company Name | Spekit Demo"
- View the Zoom Meeting Agenda Template Spek for what to put in agenda
2. Send an email to the prospect and CC your AE to make the introduction and confirm time. Always use the prospect's time zone in emails, not yours.
- Inbound- Ask prospect: "what is your goal of the call and how can we best support you", send Inbound, send Pre-demo Questionnaire
- Outbound, send "Meeting Booked Outreach Template"
3. Convert the lead or contact to Create opportunity and assign to an AE as opportunity owner. Add any deal information you have, make sure you update these fields:
- Opportunity Name = "Account Name #users" ie. "Spekit - 15" where #users is based on Sales Team on Linkedin Company insights
- Make sure Contact is listed as Primary Contact Role
- First meeting date
- Next step
- Add Meeting Handoff Notes
- Add your name in the "Biz Dev Handoff" field
- Fill out "First Success Touch"
5. Do Account Research to prep for you AE and add it to the Account/Opportunity. Do this immediately, or immediately block off your calendar for when you will be doing research. View the Pre-call research Spekit for info on what Account info to look for.
6. On day before/the morning of the meeting, send a brief email as a reply to your last email to confirm timing. Consider sending a relevant piece of content as well. If you have prospects mobile #, can send a quick, casual text to confirm meeting - this can open the door to getting on a texting- basis if they respond. Email template Link to come.
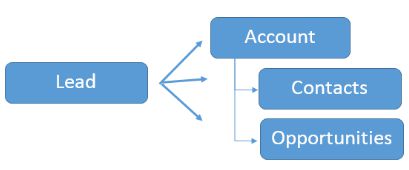
6. Convert a Lead to an Opportunity in Salesforce
Each lead conversion in Salesforce creates an Account, Contact and an Opportunity as shown below:
Business Process
Follow these steps to convert a Lead to an Opportunity:
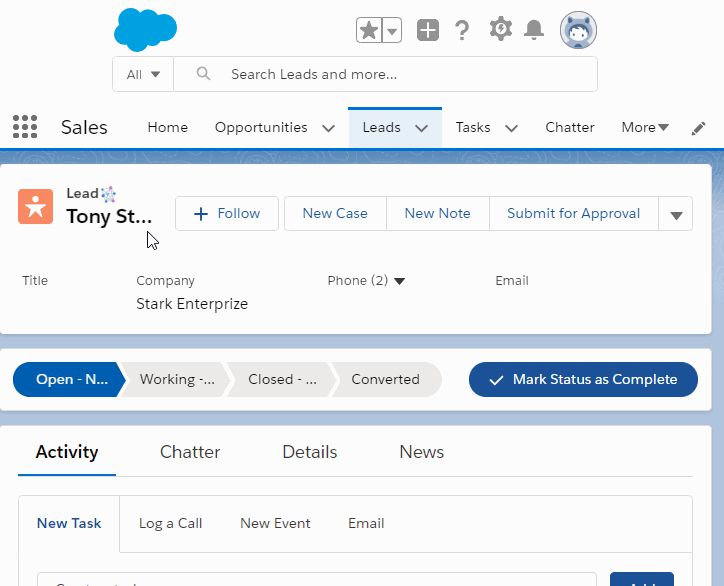
1. Click on the Leads tab at the top of your Salesforce page.

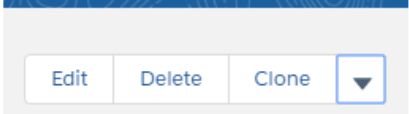
2. Select a Lead you want to convert. Click on the arrow button to the right of the page and from the drop down menu select Convert.
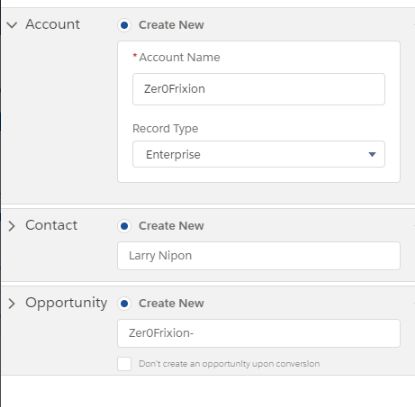
3. When you convert a lead Salesforce creates a new Account, Contact and Opportunity all at once. Select an existing Account, Contact or Opportunity or creating new ones. Click Convert.
7. Identifying important roles in an Account
When prospecting, we need to identify people in an organization we should be focusing on and people we should be avoiding.
1. Poser: The one who says I'm the guy but down the road, you'll realize he's not. This is the most dangerous person on the list and needs to be avoided
- You won't really know what they're intention is.
- You can get stuck with then and waste a lot of time.
- This, in turn, could cause you to lose deals.
2. Coach: This is the person who gives us the information we need and tells us what we need to know. They further help us navigate internal politics.
- In most cases, the information they do give us may not be of any value.
- They are not included in decision making and are usually on the sidelines of it.
3. Champion: This is someone on the inside who can advocate for us and get things done!
- They can steal budget
- They agree to be your champion
8. Qualifying a meeting
When a meeting is set, you create an Opportunity in Stage 1.
To move to Stage 2, Meeting must be qualified:
- Clear Pain and need to solve it
- Power or path to Power (key influencer or decision-maker with budget in the company)
- Timeline/Next Steps established.
If it's not qualified yet, but could move to Stage 2 within the next 30 days, then keep it in Stage 1 and AE/SDR coordinate on plan of attack.
If it's not qualified, move to Cancelled this was a Lead and change Account Status to:
- Rejected: if zero possibility of a deal there in the future
- Nurture Both: if you want prospects to receive both Sales & Marketing
- Nurture Sales: not the right timing but good fit so you will put them in a Nurture Sequence
- Nurture Marketing: possibly a fit but not worth your time
If after 30 days of your deal being in Stage 1 and no success of moving it to Stage 2, move to Cancelled this was a Lead or ask for exception to keep working on it from SDR Manager.
9. Call Prep Account Research on LinkedIn
When it comes to personalization, the most important thing to make sure the prospect takes away is why them, why now.
Search for the company name in the Linkedin Search Bar and go to company page:

Now, start doing your research:
ABOUT US - get a high level understanding of the business. Specifically look for:
- Brief description of Products/Services/Industry company is in (so you can use their terminology in outreach)
- How long the company has been around (is this an established company with existing systems in place?)
- Number of offices/locations (this gives you an idea of whether "dispersed employees" is relevant.
Next, go to INSIGHTS to get an idea of the total employees, employee growth and any relevant top hires.
- High growth = lots of hiring/onboarding needs
- Spike in growth = could indicate an acquisition, verify by looking at the news
- Top New Hires: any senior management that was recently brought in
Next go to the JOBS section - this is where you'll get an understand of any key roles they're hiring in the department you sell to:
- Then, search JOBS for the keywords “Salesforce”
- Look at any open job postings with Salesforce in the title (indicates that company is investing more into their Salesforce investment) or learning/enablement/training as it shows that the company is likely looking to address some challenges on that front.
- Look at any job descriptions for other roles that include those keywords in description - it might include how an employee will need to use Salesforce for their job or other key applications built on top of the salesforce platform they’ll use
Finally look at HOME tab for any recent posts announcing:
- Market/Office Expansions
- Partnerships
- New products they’ve launched
- Acquisitions (lots of employee training needed there)
